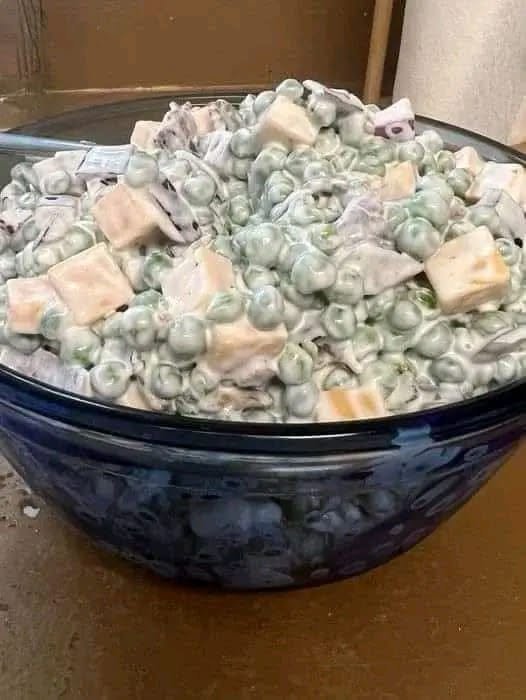
1. Prepare the Dressing
In a large mixing bowl, whisk together 1 cup mayonnaise, 1/2 cup sour cream, 1–2 tsp sugar, 1–2 tsp apple cider vinegar, and salt to taste until smooth and creamy. This forms the flavorful base of your pea salad.
Pro Tip: Taste the dressing and adjust sugar or vinegar according to your preference for the perfect balance of tang and sweetness.
2. Combine the Salad Ingredients
Gently add 4 cups thawed peas, crumbled bacon, shredded cheddar cheese, and finely diced red onion (if using) to the bowl. Fold carefully to coat the ingredients evenly without mashing the peas.
Pro Tip: Fold slowly and gently for a visually appealing salad with intact peas.
3. Chill for Maximum Flavor
Cover the bowl and refrigerate for at least 1 hour. This step allows the flavors to meld beautifully and enhances texture.
Pro Tip: Overnight chilling intensifies the flavors and gives a firmer texture, making it ideal for potlucks or parties.
4. Serve and Enjoy
Stir gently before serving. Optionally, garnish with extra bacon or cheese for a pretty and appetizing finish.
Pro Tip: Serve chilled for a refreshing contrast to warm mains, or pair with grilled meats for a nostalgic, hearty meal.
Following these steps will result in a creamy, flavorful, and nostalgic pea salad that’s perfect for family dinners, potlucks, and festive gatherings.
Pro Tips, Serving Ideas & Storage for Classic Pea Salad
These tips will help you perfect your Classic Pea Salad, ensuring a creamy, flavorful, and visually appealing dish every time.
1. Pro Tips for Perfect Pea Salad
Use frozen peas: Thawed frozen peas maintain a crisp texture and natural sweetness—avoid canned peas for best results.
Cook bacon until crispy: Drain well to avoid greasiness and add a satisfying crunch.
Chill thoroughly: Refrigerate for at least 1 hour (or overnight) to allow flavors to meld.
Fold gently: Avoid mashing the peas when mixing; use a spatula to fold ingredients slowly.
Adjust seasoning: Taste the dressing before combining; add extra salt, sugar, or vinegar if needed.
2. Serving Suggestions
Pair with grilled meats, roasted chicken, or baked fish for a balanced meal.
Serve at potlucks or picnics—easy to transport and crowd-pleasing.
Garnish with extra bacon, cheese, or fresh herbs like parsley for a visually appealing presentation.
Serve chilled for a refreshing contrast to warm mains during summer barbecues.
Plate in individual cups or bowls for buffet-style serving at parties.
3. Storage Tips
Store in an airtight container in the refrigerator for up to 3 days.
Do not freeze, as the creamy dressing and peas may separate upon thawing.
Keep garnishes (extra bacon or cheese) separate until serving for best texture.
Stir gently before serving to redistribute dressing and maintain a uniform appearance.
4. Creative Variations
Add finely diced celery or bell pepper for extra crunch and color.
Swap cheddar with pepper jack, gouda, or mozzarella for different flavors.
Use smoked paprika or a dash of hot sauce in the dressing for a subtle kick.
Incorporate cooked shrimp or diced ham for a protein boost and more substantial salad.
Following these expert tips ensures your Classic Pea Salad is always creamy, flavorful, and perfect for gatherings, casual dinners, or special occasions.
Final Thoughts — Creamy, Nostalgic, and Crowd-Pleasing
The Classic Pea Salad is more than just a side dish—it’s a comforting, nostalgic favorite that brings warmth and joy to every table. With its creamy dressing, crisp peas, savory bacon, and sharp cheese, this salad perfectly balances flavor and texture for a dish that everyone will love.
Why You’ll Love This Salad:
Quick and easy to assemble, with minimal prep work.
Perfect for family dinners, potlucks, picnics, and holiday gatherings.
Creamy and flavorful, yet light and refreshing.
Customizable with additional veggies, proteins, or different cheeses.
Chill-friendly—make ahead to save time while enhancing flavor.
Whether you’re reminiscing about cherished family meals or creating new memories, this Classic Pea Salad is sure to delight every guest. Simple to make, endlessly delicious, and always a crowd-pleaser — it’s a timeless side dish that never goes out of style!
For Complete Cooking STEPS Please Head On Over To Next Page Or Open button (>)
Sugar Free Condensed Milk 3 Ingredients

Most People Don’t Realize This, but the Color of Chicken Actually Tells You a Lot
How to Pick a Perfectly Sweet Watermelon: Easy Tips at a Glance

Caramel Cream Cake

Pour evaporated milk over beef round steak, with 2 other ingredients, into slow cooker for a rich pasta meal that disappears faster than anything else I make